Bambu Studio is a GUI, and you can't run agents in parallel through a GUI. Every step of my part design was already a script, and the plate was the one step that needed a person clicking. So I built shambu, a command-line tool and Claude Code plugin that turns STL files and a short JSON spec into a checked Studio project (a 3MF file), sliced headless with its time and grams.1 Plate-making is now a background task. An agent arranges, slices and compares, and I verify the result instead of doing the work. On one two-filament plate, that search took Studio's estimate from 1 h 24 min to 40 min.
shambu drives Studio's own command line, so it can try a plate (the set of parts printed together on the bed) many different ways and read Studio's answer each time. The biggest win so far is printing by object, one whole part after another, instead of by layer, which took that plate from 100 nozzle changes to one.
I wrote it because I was printing parts for a robot gripper, which is its own story in Building the Robotic Bricklayer. Every plate was the same round of arrange, slice, read the estimate and try again.
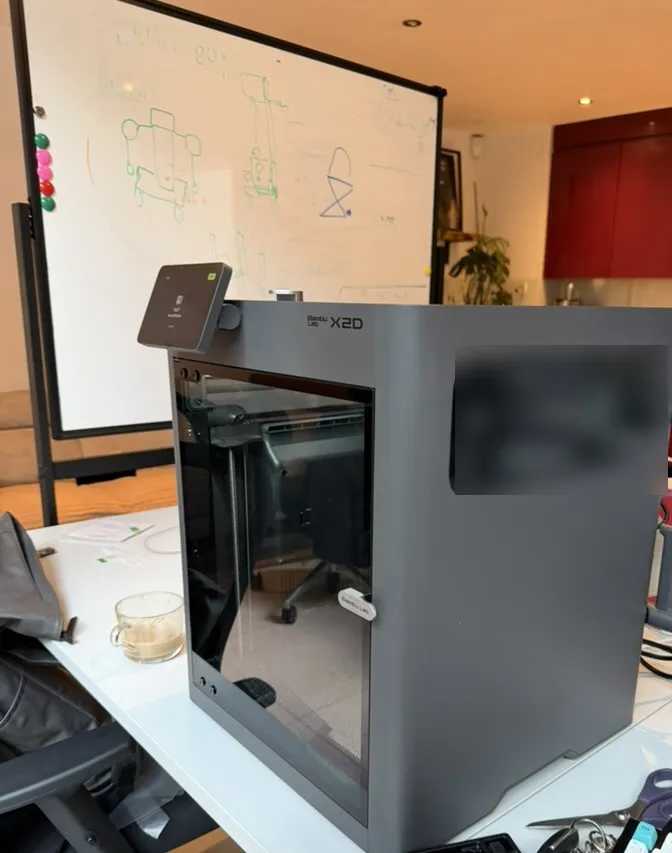
The main thing I learnt is that an agent can search plates much faster than I can in the GUI, as long as the slicer decides what fits and what's fast. Studio's slice is the test, and shambu's own rules are warnings.
shambu never starts, pauses or stops a print, and the README says pull requests that add printer control aren't merged. I still look at the plate in Studio and press Print.
This post covers how shambu works, what reverse engineering Studio turned up, how it reads the printer, and where printing by object wins and loses. Then come four things I found (the plate count, print settings Studio dropped on open, the verbs an agent needs and the time estimates), the CAD side, design at scale, my printing notes and the open problems.
The tool is MIT licensed and at version 0.9.1, which also has a printability pre-flight and a topology map, not covered here. Every number here is from one printer model, a Bambu Lab X2D, on macOS with Studio 02.08.02.61.
Key Findings
- Print by object was the biggest win. In Studio's estimates, a two-filament plate went from 1 h 24 min to 40 min. It loses on tiny parts, where six 10 mm cubes on one filament went from 14.5 min to 27.8 min. A sweep of eight slices on one bracket took two minutes (Print by Object).
- Parts as scripts and plates as specs let agents design in parallel, which a click-and-drag GUI can't do. I ran 202 agents that wrote and built 100 ClassCAD models in 55 minutes with no failed build (Design at Scale).
- Studio's command line works headless once you know its undocumented rules, and eight are listed below. An export that seemed to take five minutes was waiting on a hidden macOS alert, and a real export takes 0.3 s (Reading Studio).
- The first run on real CAD found three bugs the synthetic tests had missed, one of them a second copy of a part floating 38 mm up (Reading Studio).
- My checker wanted three plates where one printed, and 37 mm between the housing and the camera shell where 10 mm was enough. Now Studio's slice is the clash test and my own rule is a warning (Three Plates).
- A file that slices right can still open wrong in the GUI. Studio reset my process (its name for the print settings) to 2 walls and 15 % grid because shambu's file didn't list its overrides, and the re-slice dropped from 216.1 g and 6 h 36 to 157 g (Lost Process).
- An agent improvises when the CLI has no verb for an edit. Hand-editing the 3MF's XML silently kept the old mesh, so there are now verbs to replace a mesh, add a filament, move an object and place the tower (Missing Verbs).
- The printer read works the same in cloud and LAN-only mode. Switching to LAN-only gave the X2D a new access code, and every read failed until shambu had the new code. The lasting fix is
shambu printer login(Reading the Printer). - Studio's time estimate is uncalibrated. Two logged prints ran at 0.75 × and 1.05 × the estimate (Time Estimates).
- A CAD check has to be able to fail the build. One check compared the engine with its own input and passed a lid 5.8 mm short. Now every part proves its own volume within 0.5 % and every build carries a hashed id (CAD as Code).
One Plate Loop
Bambu Studio is a good tool for one plate. You drag the parts on, pick a process (layers, walls, infill, supports), press Slice, and read the time and grams. Another orientation or a second plate means the whole round again, a few minutes by hand, so I never tried more than a handful.
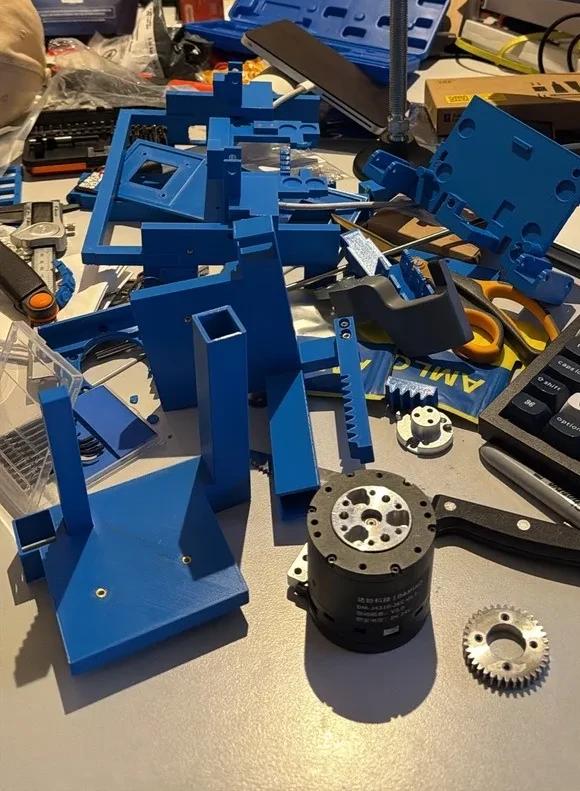
I reverse engineered Studio properly and gave shambu a repo of its own, with tests and pull requests. It has 1,569 test functions now, and an agent runs the round and hands back its best plate with the numbers.
Spec to Project
You describe a plate as a JSON spec. This is the minimal one from shambu's skill, for two jaws and a label on a two-nozzle printer:
{
  "name": "jaws",
  "outdir": "/abs/dir",
  "printer": "Bambu Lab X2D 0.4 nozzle",
  "process": {
    "base": "0.20mm Standard @BBL X2D",
    "name": "PETG functional",
    "recipes": ["petg-functional", "no-hole-compensation"]
  },
  "filaments": [{ "preset": "loaded" }, { "preset": "loaded" }],
  "bed_type": "Textured PEI Plate",
  "plates": [
    {
      "name": "p",
      "print_sequence": "by object",
      "group_by_filament": true,
      "parts": [
        {
          "path": "/abs/jaw.stl",
          "count": 2,
          "lay_on_face": [0, 1, 0],
          "recipes": ["tree-supports"]
        },
        {
          "path": "/abs/label.stl",
          "filament": 2,
          "recipes": ["flat-no-brim"],
          "at": [150, 20]
        }
      ]
    }
  ]
}
"loaded" means the spool that's actually in that nozzle, which shambu reads off the printer. lay_on_face says which face goes on the bed, and at pins a part's front-left corner. Recipes are named bundles of settings, like tree-supports.
"loaded" is there because a spec written for one spool once passed every check after I'd changed spools, and the project opened in Studio with a filament that wasn't loaded. Now check and build read the printer first, and a pinned preset that doesn't match the spool is a FAIL.
To install it as a Claude Code plugin, run /plugin marketplace add Shavvimal/shambu, then /plugin install shambu@shambu and /shambu:setup. For the CLI alone, the README's line is uv tool install "shambu @ git+https://github.com/Shavvimal/shambu@v0.9.1", and it needs macOS with Bambu Studio installed. Then two commands:
shambu check  plate.json         # resolve presets, measure STLs, place parts, check limits
shambu build  plate.json --slice # also slice headless: <name>.gcode.3mf with time and filament estimates
check resolves the presets from Studio's own profile files, measures the STLs and places the parts on their outlines, never rotated. Then it checks:
- the bed
- both nozzles' reach, because the auxiliary one only gets to 235.5 mm in X
- TPU on the main (left) nozzle, because TPU 95A only prints through that one
- each neighbour's support spread, which is how far a part's supports reach past it
- the prime tower, the block a two-filament plate wipes the nozzle on after each change
build runs the Studio binary headless in a private home folder and exports the project. patch then fixes what Studio's command line leaves wrong in the 3MF: the bed type on each plate, every filament colour, the object names and the nozzle map, which says which filament goes to which nozzle.
verify re-reads the file, compares it with the spec and loads it through Studio's --info. Last comes report.md, the hand-back, which lists every placement with its numbers, every check line, the patches, Studio's estimate and what I should do next.
After the report, I check the plate in Studio. shambu open gives the project to the GUI, which opens it unsliced, so I press Slice plate. That's by design: Studio only loads a file's embedded G-code when the project has no objects. The GUI's estimate has to match the report within a minute and a gram. On the sweeper plate, after I set the process back by hand (Lost Process), the GUI read 216.78 g and 6 h 37 against the report's 216.8 g and 6 h 36. If it doesn't, the README says to save a copy from Studio and run shambu verify on it before printing anything.
Reading Studio
shambu has no slicer of its own. It runs the Bambu Studio binary that's already on my Mac, and most of the work was finding out which flags actually work. The rules come from Studio's source at tag v02.08.02.612, the shipped macOS binary, its crash reports and real project files. They're written up in the repo's references, and every rule the code enforces cites one.3
These are the ones I'd want to know if I were scripting Studio myself:
- An export that sat for five minutes wasn't computing anything. After any Studio crash, macOS shows a hidden "reopen windows?" alert inside the command-line process, which then waits for ever at 0 % CPU. shambu points
CFFIXED_USER_HOMEat a private empty folder on every call, and a real export takes 0.3 s. - The command line never resolves
inheritsorincludein a preset. A half-resolved X2D project gets a generic 577-character start G-code instead of the printer's 14,848-character one, so shambu merges both itself. Studio goes parent, then include, then the preset's own keys, and shambu merges in that order. - The best orientation vector Studio prints points up, not down, so the face to lay on the bed is minus that vector.
- Two filaments with no colours crash the slicer with exit 139, because the flush matrix (how much to purge between each pair of filaments) stays 1 × 1.
- The prime tower position is one value per plate. Pass a single number and only plate 1 moves. On an eight-plate organiser build, plate 2 failed with exit -102.
- Copies of a part are placed relative to the first copy, not the bed. A link at z -38 in its CAD frame printed its second copy floating at z 38.
filament_change_timescounts filament loads, not nozzle switches. On a two-nozzle plate it said 0 where the G-code had 41 tool switches, so shambu counts them from the G-code.- An unsliced export writes
extruder_nozzle_stats: [], and every later slice of that file dies with exit 156, "No valid nozzle found". That happens even with one filament.
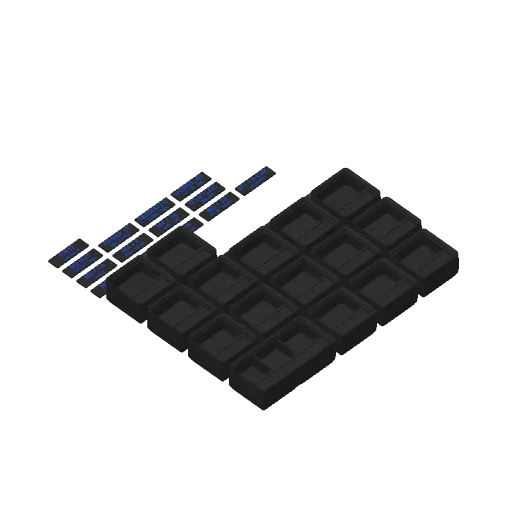
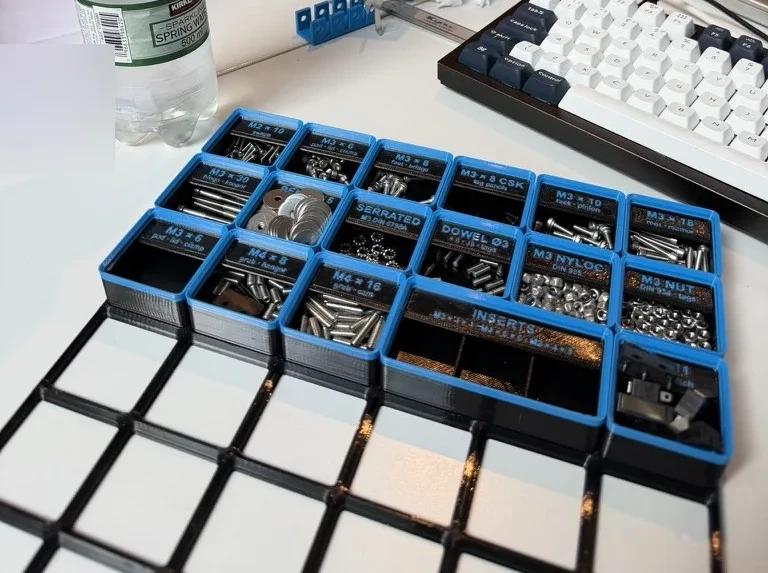
With those rules in the code, a plate slices in about a second, so an agent can afford to slice every variant it wants to compare. Some of the rules only showed up on real parts. The first run on real CAD found three bugs the synthetic tests had missed, and the floating copy at z 38 was one of them.
Reading the Printer
The only thing shambu reads off the printer is its status, over the local network (MQTT, the Message Queuing Telemetry Transport protocol, on port 8883, user bblp, the LAN access code). That's the same read in cloud mode and in LAN-only mode, and neither needs Developer Mode, because Bambu leaves status pushes outside its Authorization Control.4 The one setup step is the access code, which shambu takes from Studio's config or from shambu printer login. shambu finds the printer by scanning the local subnet for port 8883, which takes about 2 s.
When I switched the X2D to LAN-only mode on its touchscreen, every read failed with "Not authorized". The printer had given itself a new access code (seen once on the X2D), and Studio's stored code was the old one. Writing the new code into Studio's config with Studio closed fixed it, but only until Studio next saves, because it rewrites the file every 5 s and clears the stored code after a refused login. The lasting fix is shambu printer login, which stores the new code for shambu itself.
Studio sends a get_access_code command on every connect and the printer answers with the code, which would fix this on its own. shambu never sends it, because it isn't pushall and the read-only rule forbids it. It also never retries a refused login, because the printer refuses the same way while it boots or shuts down.
Print by Object
By default Studio prints a plate by layer: one layer of every part, then the next layer. On a two-nozzle printer with a different filament on each part, that's about one nozzle change per layer plus a prime tower wipe after each one, so a 20 mm tall plate at 0.2 mm layers costs 100 changes. Printing by object finishes each part before starting the next, so it needs one change and no tower.
These are Studio's estimates on the X2D, one slice each, from the repo's optimisation notes:5
| Plate | By layer | By object |
|---|---|---|
| a bracket plus two 20 mm cubes on filament 2 | 1 h 24, 100 changes | 40 min, 1 change |
| a joint part and a mount (PLA) with a shaft (PETG) | 1 h 24, 70 changes | 59 min, 1 change |
| a duck and two funnels, two filaments | 2 h 40, 273 changes, 18.9 g tower | 1 h 13, 1 change |
| six 10 mm cubes, one filament | 14.5 min | 27.8 min |
| three Gridfinity bins, one filament | 2 h 09 | 2 h 11 |
The slicer counts about 14.5 s per X2D nozzle change, and the prime tower adds to that. One slice below has a 127-minute tower. By object loses on tiny parts because, printed alone, each object has to meet the filament's minimum layer time, 4 s for Bambu PLA, so six 10 mm cubes spend 20 min waiting.
By object also needs room around each part, because the head has to get past the ones it's already printed. Parts on the same filament go next to each other and print as one group, which is what group_by_filament in the spec does.
So the skill's rule is to slice both ways and keep the faster one, which is what shambu sweep does. Each variant is a small JSON patch over the spec, and the sweep prints a table of time, grams, support, waste and filament swaps. --write-spec writes the winner back out as a spec you can build.
Orientation gets the same treatment. shambu orient scores each candidate face with no slicer at all: the support shadow, minus a quarter of the bed contact, plus twice the height, plus a penalty for tall thin parts. Those weights are a heuristic, and the score counts bridges as overhang, so I use the sweep for anything with real bridges.
The sweep only sorts by time, and its source says why: "strength and finish are the user's call". I ran it on a bracket for the gripper to see if the print could go faster, and it came back two minutes later with eight slices.
The line under each bar in the figure says what that slice changed.
shambu sweep output for the bracket plate (Bambu Studio 02.08 estimates, not printer times), the bracket in green Bambu PETG Basic; the cost under each bar is my reading of what that change breaks. Bars start at zero.
The baseline was 6 h 42, layers of 0.28 mm made it 5 h 26, and adaptive infill made it 6 h 02. But its fit coupons (small test prints) were measured at 0.20 mm layers, and the strength sums assumed gyroid infill. So the faster slices would have printed a bracket the checks hadn't seen. A PLA support interface from the second nozzle went the other way, to 10 h 17, because of 128 filament swaps and a 127-minute prime tower.
Three Plates
I had the last gripper parts to print and wanted them on one plate. shambu said "FAIL: the parts need 2 plates", and with the long feeler bar split off it said three. I dragged the housing, the camera shell and a mount onto one plate in Studio myself, and Studio sliced it at 10 h 36 min and 271.46 g on its default process.
The parts fitted, and the checker's rule was too cautious. The old rule grew every part with supports by 0.25 × its height on all four sides, clamped to 5 to 25 mm, and it used bounding boxes instead of outlines. It also added both neighbours' margins together. For the 218 mm housing and the camera shell that came to 25 mm plus 12 mm, so it wanted 37 mm between them where 10 mm is enough.
The packer, the part that places parts on the bed, had its own fault. When it gave up, it left the parts at the origin and printed bed-edge FAILs for positions nobody had chosen.
A plate with the mount beside the housing passed, and the feeler bar now prints straight along the bed edge.
Studio itself has no clearance rule between objects before it slices. After slicing, it refuses two objects whose paths cross in the same layer, with exit -101 and both objects' names. So the slice is the real clash test, and anything shambu checks before it is a pre-flight.
I then added a new cradle, and that five-object plate sliced at 18 h 0 min and 480.7 g and went on the printer. The fixes went out as 0.4.0.6
The support spread is now an estimate per side, min(26, max(8, 0.22 × height)) mm for tree supports and 5 mm for normal ones. On the printed plate the widest spread was 20.9 mm, on one side of the 218 mm housing, and an earlier 170 mm bracket gave 15.6 mm. A 116 mm test part in a replay spread 24.8 mm, which set the 0.22 ratio and the 26 mm cap.
A pair of parts needs the larger of the two spreads plus 1 mm, not the sum. A footprint is the part's silhouette rasterised at 0.5 mm, not its box. A short gap against the estimate is a WARN margin rule now, and the slice decides.
--probe-supports measures the real spread with a solo slice of each part. A new bottom-left packer prints PLACEMENT NOT DONE when it gives up, instead of leaving parts at the origin.
The figure puts the five parts on the 256 mm bed where I placed them, and its switch shows what the old rule and the new one each want between the housing and the shell, which were 10 mm apart.
Old margin = clamp(0.25 × h, 5, 25), all four sides; a pair needs the sum. housing: 0.25 × 218 = 54.5 → 25 mm
| Pair | Gap | Wants | Verdict |
|---|---|---|---|
| housing · shell | 10 | 37 | refused |
| housing · mount | 20.1 | 33 | refused |
| housing · cradle | 13.6 | 32.3 | refused |
| shell · mount | 13 | 20 | refused |
| shell · cradle | 14.4 | 19.3 | refused |
| feeler · cradle | 16.3 | 23.3 | refused |
| housing · bed edge | 15 | 25 | refused |
| feeler · bed edge | 226 + 2 × 16 | ≤ 256 | refused |
- Housing to shell
- checker wants 37 mm
- The plate had
- 10 mm
- Old rule
- 6 pairs refused, 2 parts off the bed
- housing at h 218
- 25 mm margin
The shambu 0.4.0 post-mortem and CHANGELOG in the public repo (github.com/Shavvimal/shambu): part sizes, the old margins 25 / 12 / 8 / 16 / 7.25, the 37 mm and the 0.4.0 rule. The 0.4.0 spreads come from shambu's report on the one-plate build, which ends “OK: 5 part(s) fit” with each short gap a WARN. Positions follow the plate I printed, with box gaps set to the clearances the record gives. The model uses bounding boxes and one spread on all four sides; 0.4.0 applies spreads per side, so this overstates its warnings.
Under the new rule that 10 mm gap is still short of the 26 mm estimate, so it warns. My hand-placed plate, rebuilt as a spec, sliced at 17 h 58 min and 478.9 g against Studio's 18 h 0 min and 480.7 g. That was a replay in the slicer, not a second print. A rerun of the files that had failed before passed 8 of 11 cases outright and 3 partly, and none failed hard. The packer still needs my at positions for this layout (Open Problems).
Lost Process
I was printing parts for a sweeper tool on the robot, and the project shambu exported didn't keep its process when Studio opened it. Studio showed the stock 0.20mm Standard @BBL X2D and re-sliced at 2 walls and 15 % grid instead of the spec's 4 walls and 25 % gyroid. The plate came to 157 g and 5 h 02 instead of the 216.1 g and 6 h 36 shambu had sliced. I set the walls, infill and bottom layers back by hand.
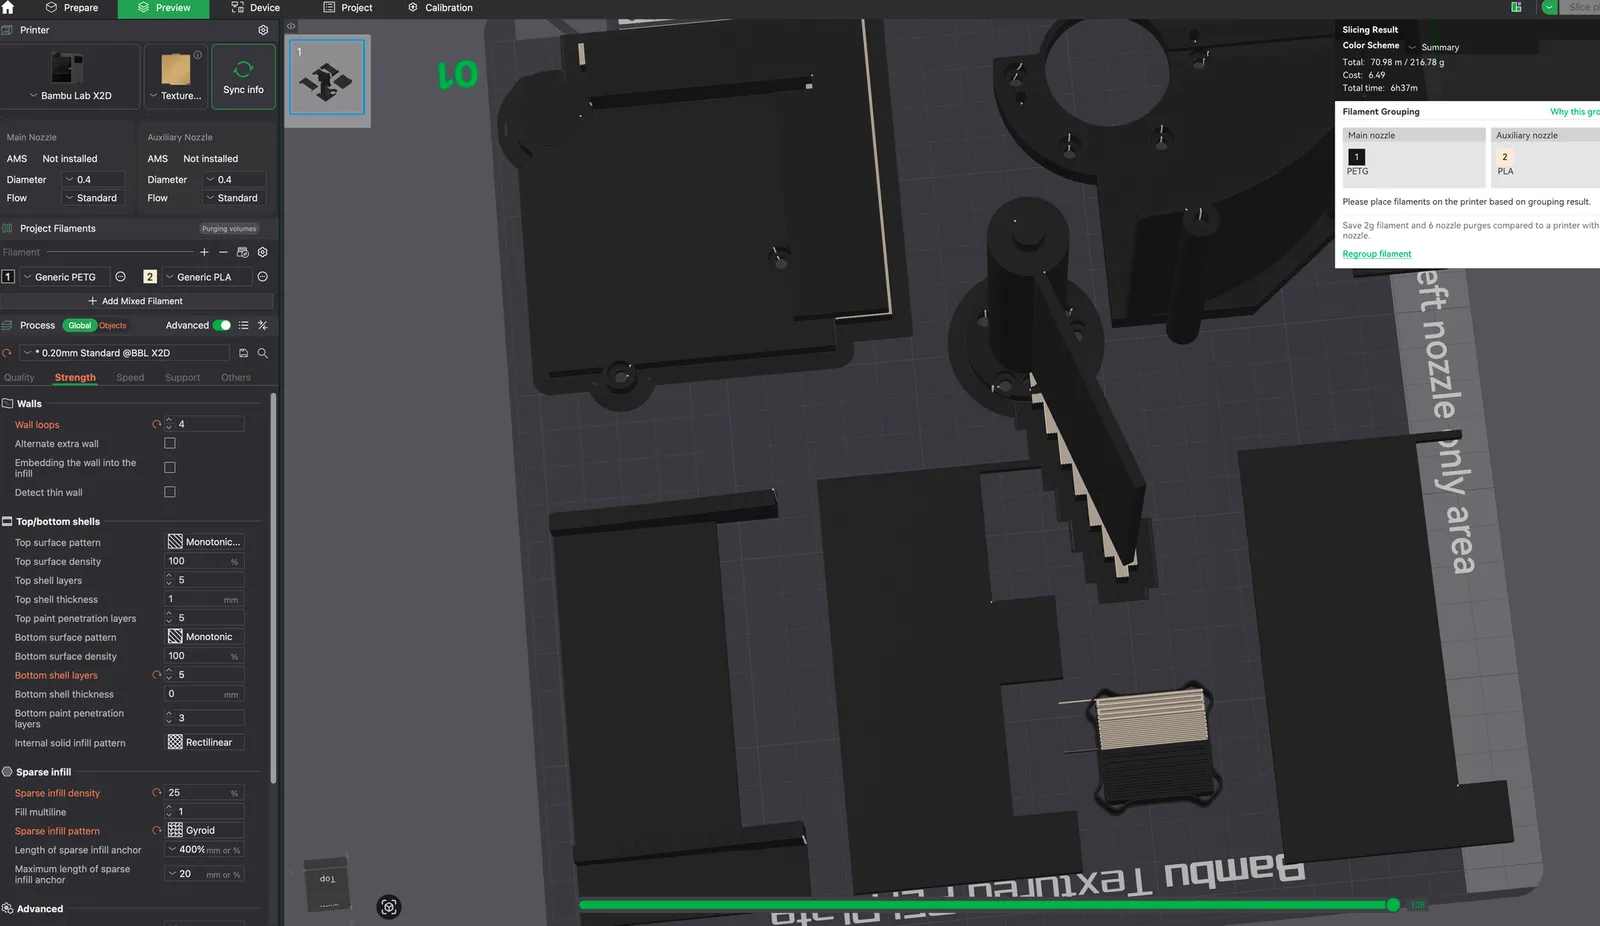
shambu's export wrote the process as a user preset Studio didn't have installed. It also left different_settings_to_system empty, which is the list of keys that differ from the base preset. On open, Studio resets every process key that list doesn't name back to the base preset. Per-object settings don't go through presets, which is why shambu's per-object recipes stayed and the global values vanished.7
shambu now names the base system preset in every export and lists the overrides. From Studio's source, it should then show 0.20mm Standard @BBL X2D (modified) with the values in place, as long as an override differs from the base. There's also shambu verify project.3mf --against plate.json, which checks a project saved from the GUI against its spec. That's the check in Spec to Project.
Missing Verbs
An agent improvises when the CLI has no verb for what it needs. On one plate, shambu had no verb to replace a mesh, add a filament, move an object or place the prime tower. So the agent unzipped the 3MF, rewrote its XML by hand and ran Studio by hand nine times, against the skill's rule. The first hand edit silently kept the old mesh.
There are verbs for all four now (patch --replace-mesh, --add-filament, --move and --tower). shambu studio -- still runs Studio directly as a logged escape hatch, but it only runs with my yes.
Skipping the Studio check is the other shortcut an agent keeps reaching for, by uploading from the Device tab or printing the embedded G-code untouched. The Studio pass is a written rule in the skill now, and the fix for the lost process was to make the GUI path work.
Time Estimates
Every slice time in this post is Studio's estimate, which is a prediction from the moves. It simulates them against the machine limits and counts heat waits as 0 s, and nothing in it scales the result for a particular printer.
Only two of my prints have a progress log to check it against. The bracket from the sweep above took 211 min over layers 11 to 620, where Studio predicted 281. That's a ratio of 0.751, and about 0.75 to 0.80 over the whole print.
A later plate with the cradle ran at 1.05 × between layers 135 and 182. One ran fast and one ran slow (Open Problems).
The likeliest cause on the bracket is a speed level other than Standard, and it wasn't logged. shambu printer watch --log now stamps every poll with its own time and the speed level. shambu calibrate will only offer a calibrated time from three qualifying prints of one printer model and material whose rates agree within 0.15. Until then, every time shambu reports says "Studio estimate".
Before there's a slice at all, I plan at 25 g per hour. Two real gripper plates ran 86 g in 3 h 11 min and 242 g in 9 h 31 min, which is 27 and 25 g per hour. Once there's a slice, the slicer's number wins.
CAD as Code
The CAD side of shambu came from the gripper. I built its parts in ClassCAD, a CAD engine with no window that an agent drives with JavaScript through an MCP server. After one test part, I ported the whole gripper to it, because I wanted to design all my parts this way from then on.
Each part is a script that reads a shared params.json and returns the volume its own arithmetic says the part should have, and the runner, ccrun.mjs, compares that with the volume the engine measures.
That habit started with the test part, which was a duck. It was two outlines of 157 and 24 sketch lines, extruded 5 mm, and the engine measured 4,686.73 mm³ against 4,686.7 from the polygon areas. A duck got a volume check because of something I'd found in ClassCAD while building it: the engine reports success for operations that did nothing.
The notes have three more. A fillet on three edges answered "Duplicated references have been removed" and filleted one 4 mm segment. A GLB export came out in metres, so the whole gripper rendered as a 0.3 mm speck at the origin, which I found when the review page showed only the axes. And a single 1,099-point outline for an 18-tooth pinion timed out, so the gear is built one tooth at a time.
Every build also gets a build id: the revision, an @, and the first 12 hex characters of a SHA-256 over every file that went into it. That's the parameters, the assembly file, the runner itself, every part script and every STEP file a part imports, and a missing file hashes as the bytes MISSING. The first version hashed the parameters only, so a moved hole in a part script kept the old id.
Since that fix, the gates (the scripted checks a build has to pass) compute the same id and refuse a report stamped with another one. It also means my design history is a git diff, which I love.
The camera housing's sampler checked the engine against the same list of shapes the engine had built from, so it passed a lid that sat 5.8 mm short of the camera's standoffs. The runner's other checks only collected their results, and the runner exported anyway.
So the rule we adopted is "a check that does not fail the build is decoration", and ccrun.mjs and clash.py now exit 1. This is the fail rule in the runner:
// a failed check or a volume error over 0.5 % is a failed build: exports stay on disk for inspection, but the exit code says so
const failed = (report.checks ?? []).filter((c) => !c.ok);
if (
  failed.length ||
  !(Math.abs(report.volumeError ?? 1) <= 0.005) ||
  !(report.volume > 0)
) {
  console.error(
    `BUILD FAILED ${name}: ${failed.length} failed check(s), volumeError ${report.volumeError}`
  );
  process.exitCode = 1;
}
By the end every build ran eight gates after the assembly, from clash.py for parts hitting each other to a gate for parts hitting the arm. That chain took 65 min 11 s, and a rewrite with the same answers took it to 9 min 30 s.
The gates only check what's in the model. One bracket passed every one of them and still went through a ring on the arm that no gate modelled (The Fixed Side). The export needed a guard too. An export of only some parts left that rejected bracket in the folder looking current, so the exporter now prints "STALE FILE" for any file on disk more than 0.1 % off in volume from the build.
The checks that weren't tied to one gripper went into shambu as shambu cad, which reads exported files only and never drives a CAD program. cad stamp writes a record beside the STL with a build id over the saved script and parameters, the STL and STEP hashes and the volume the CAD session reported.
cad check proves the STL is one closed solid with the right volume and size, and refuses a stale export by build id and by the STL's own hash. cad fit gauges holes and insert pockets, and cad clearance and cad sweep look for clashes between parts and along an insertion or rotation path. The designing-for-print skill drives ClassCAD and keeps an export only when shambu cad gate passes. Its build steps still say to check the volume drops after every cut.
Design at Scale
Every part is a parametric ClassCAD script and every plate is a shambu spec, so I can give the design work to many agents at once. That's the best reason I have to build skills like these. A click-and-drag CAD program takes one person dragging one model, and a slicer GUI takes one person arranging one plate. A script and a spec don't need a window, so a hundred agents can each write one.
That's how I use shambu with ClassCAD at scale. shambu optimises the plates and tells me what each one costs in hours and grams.
The biggest run was for the mortar tool on the robot's left arm, and Mortar on Paper has the full story. I ran two sets of 293 and 273 agents that screened 103 concepts on paper and answered 2,729 challenges. Then I ran 202 more that modelled every concept in 55 minutes.
A hundred of them wrote a ClassCAD script each, in parallel. ClassCAD holds one drawing per session, so the hundred builds ran one at a time, and none failed. The other three concepts already had models, and with 15 from two earlier rounds the set came to 118, all in the explorer in that post. The figure replays that run: the hundred scripts in parallel, then the builds one at a time.
- Clock
- 00:07
- Specs
- 100 / 100
- Built
- 100 / 100
- Failed
- 0
Viewer updated at 00:07: 100 of 100 built, no build failed.
The run record: 202 agents from 23:12 to 00:07, 100 of 100 models built and none failed. The record has no per-agent times, so the timing here is schematic: specs modelled as all done by 23:20, builds evenly spaced from 23:20 to 00:05, the viewer agent from 00:05 to 00:07.
Those models are sketches of 12 to 15 boxes and cylinders each, for comparing shape and reach, not for printing. The lead concept, cut down, became the sweeper. It went through eight ClassCAD builds in 3 h 11 min, with a check script that passes in 42 s.
shambu sliced its plate four times: 5 h 41 min and 194.5 g, then 6 h 30 min and 212.3 g, then 6 h 36 min and 216.1 g, and a re-slice of that at 216.8 g. That's the plate that went on the printer in Lost Process.
Printing Notes
I settled on these habits for the gripper parts, all PETG on a 0.4 mm nozzle at 0.2 mm layers. A lot of shambu's recipes are these written down.
- Pick the bed face first. Layers are strong in their plane and weak across them, so the load goes in the layer plane. A bore only prints round when it's vertical. I export every STL already lying on its bed face, because rotating by hand in the slicer is where mistakes happen.
- Holes print small, by an amount that depends on direction. A vertical hole came out about 0.1 mm under, and a horizontal, bridged one 0.2 to 0.3 mm under. One slicer offset can't cover both, so the clearance lives in the CAD, which is the
no-hole-compensationrecipe. - Print a coupon before the part. It's a flat plate with a ladder of hole sizes, or a slice of the real part, and it has to print in the same orientation as the feature it stands for.
- Heat-set inserts. In PETG on this printer, an M3 × 4 × 4 insert wants a Ø3.8 hole, an M4 × 6 × 6 a Ø5.8 and an M2 × 4 × 3 a Ø2.9. I set the iron to 245 °C, press straight down for about 3 seconds until it's flush, and wait 30 seconds. Plastic bulging at the rim means the hole is too small, and an insert that turns under the screw means it's too big.
- Walls before infill. 6 wall loops and 40 % gyroid did most of the work on thin parts. 100 % infill only went on the parts sized as solid in the stress sums.
- Supports and brim per object. Nothing that lies flat gets supports, and upright parts get tree supports. Only tall or long, narrow parts get a brim.
- A PLA interface under PETG. PLA and PETG barely bond, so a PLA interface on PETG tree supports pops off and leaves an almost unmarked surface. It needs one material per nozzle and a prime tower, and that was the 10 h 17 slice above.
- Wash the plate. Most failed prints are a part or a corner coming loose, so I wash the plate with dish soap and hold it by the edges.
Coupons are the habit I'd pass on first. A coupon costs an hour and a few grams and it can save a whole print, because printed plastic doesn't come out at the drawn size, and it's off by different amounts in different places. The first layers squash outward (elephant's foot), the plastic shrinks as it cools, and holes close up by an amount that depends on which way they print.
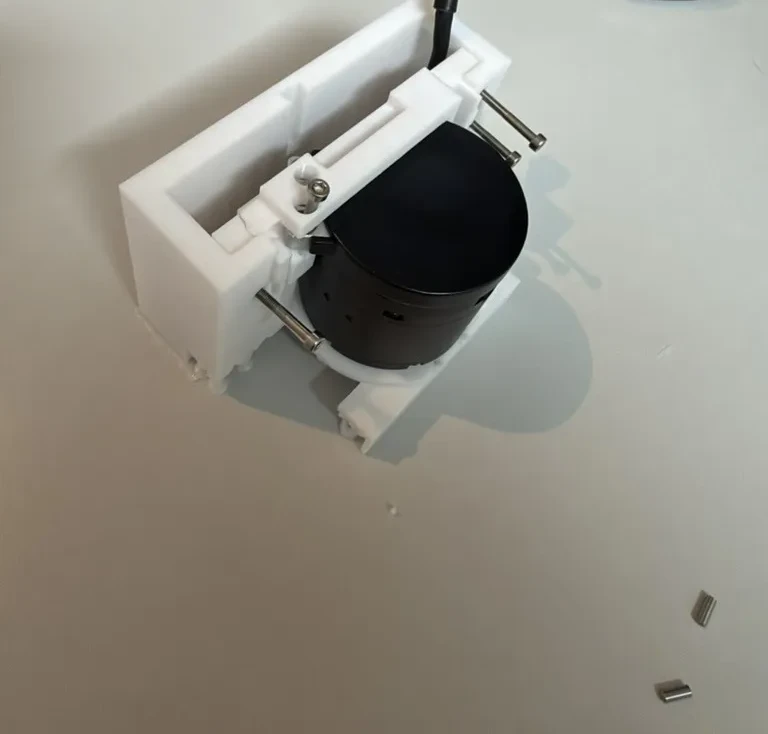
Gripper as Code has the measurements. My first ladder had rings at Ø17.0, 17.1, 17.2 and 17.3 for a motor spigot that measured Ø16.96, and only the Ø17.1 went on. The Ø5 steel tube the hinges turn on only turned freely in the Ø5.3 vertical hole, so that one tube is drawn at Ø5.3, 5.4 and 5.5, depending on which way the hole prints and how long it is.
Four links had already printed with Ø5.2 eyes, and they were scrap. Before the 18 h plate in Three Plates, I printed a coupon of just the motor bay, and the motor fitted first time.
Open Problems
- The packer doesn't find my hand layout on its own yet. Without
atpositions the five parts from Three Plates pack on two plates, and the printed layout needsatfor the feeler bar and the cradle, which sits in the bar's pocket. Studio's own arrange can't do it either, and exits -21 on the same parts. - Studio's time estimate has no correction factor yet. The two logged prints ran at 0.75 × and 1.05 ×, so
shambu calibratestill waits for three prints that agree. - The slice isn't certain right at the edge. At a 0.25 mm gap, 2 of 4 identical slices passed Studio's conflict check.
- The
(modified)label for an exported process is read from Studio's source and the file. I haven't checked it in the GUI yet.
Takeaways
- Let the slicer judge. A headless slice takes about a second, so a tool's own rule shouldn't refuse a plate Studio hasn't seen. Make those rules warnings and let exit -101 decide.
- Slice both print sequences. By object saved 1 h 27 min on the duck and funnels and lost about 13 min on six tiny cubes.
- The fastest slice isn't automatically the one to print. Check what it changed against what your part's checks assumed.
- Give the agent a verb for every edit it needs, or it will improvise one, and an improvised edit can fail without saying so.
- Keep Studio as the last look, and don't send a file straight to the printer. Open the project, slice it in the GUI and compare against what the tool said, because a wrong slice found after the print costs the print.
- Treat every time as Studio's estimate until you've timed your own prints.
- Don't accept a cause for a failure that no output shows. The skill now writes "The cause is not established" when no line backs a cause.
- Print a coupon of the fit before the whole part.
- Keep parts as scripts and plates as specs if you want agents working in parallel.
- Make every CAD part prove its own volume, hash every input into a build id, and make a failed check fail the build.
Footnotes
-
shambu on GitHub, MIT licence: https://github.com/Shavvimal/shambu ↩
-
Bambu Studio source at tag v02.08.02.61: https://github.com/bambulab/BambuStudio/tree/v02.08.02.61 ↩
-
shambu's reverse-engineering findings for Studio 02.08.02.61: https://github.com/Shavvimal/shambu/blob/main/skills/shambu/references/00-findings.md ↩
-
shambu's printer profile spec, on LAN-only mode and the access code ↩
-
shambu reference 08, section 4.1, "The by-object hack, measured": https://github.com/Shavvimal/shambu/blob/main/skills/shambu/references/08-optimisation.md ↩
-
The 0.4.0 write-up, on three plates and uncalibrated estimates ↩
-
The lost-process post-mortem, on projects losing their process when Studio opens them ↩